
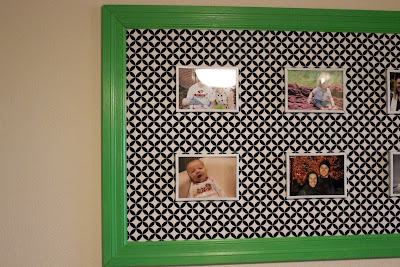
As soon as I saw this giant frame (Ex) full of smaller frames and pictures on Pinterest I knew I wanted one in our new place. Since we have a completely open concept in our place our living room and dinning room both have the same long wall. I thought that one giant frame would take up a lot of space on the wall and give me a place to show some of my favorite pictures.
I started out with created a rough idea of what the frame would look like on the wall with masking tape. I used this to figure out that I needed 6 (5x7) frames. I knew I wanted white frames that were small and inexpensive since I wanted the pictures to stand out as opposed to the frames. Michaels had a pack of 6 silver frames for $15 that were perfect. So I snagged those and white spray paint.

Jake and I then went to Home Depot to get the wood and paint. After deciding on the perfect Kelly Green color, and cutting the wood we returned home to nail them together and paint it.


I was debating about putting anything behind it. So I just had Jake attach it to the wall with those velco command hooks to test it out. I knew right away it needed something behind it to help the pictures stand out. It just looked blah without anything behind it.

So I ventured out to Joanns to get some fabric for the back. Jake helped me hot glue and super glue the fabric to the back of the frame. We then attached command strips to the back of the frames and super glued them to the fabric and finally it was done. I actually love it more than I thought I would and am currently trying to figure out how to make one work in Ty's room.


Now onto the next project!
No comments:
Post a Comment